Connecting Metamask to Binance Smart Chain
Before starting, you will need a wallet that works with the Binance Smart Chain (BSC) network.
Please follow the guide here in order to connect your Metamask wallet to the BSC Network.
Adding BEP20 FIRO support to your Metamask wallet
-
Open your Metamask wallet and click on ‘Add Token’.
-
In the next screen, choose ‘Custom Token’.
-
In the ‘Token Contract Address’, enter the following:
0xd5d0322b6bab6a762c79f8c81a0b674778e13aed
-
If you correctly setup your wallet with BSC in the first step, the ‘Token Symbol’ will be automatically filled with ‘FIRO’. Click next.
-
Click the Add Tokens button.
Converting FIRO to BEP20 FIRO
There are two ways to convert FIRO to BEP20 FIRO: FiroDEX and Binance Exchange. Converting through Binance Exchange requires a Binance account. No account is required for converting through FiroDEX.
Binance Exchange
Before starting, you must first have FIRO on the exchange.
-
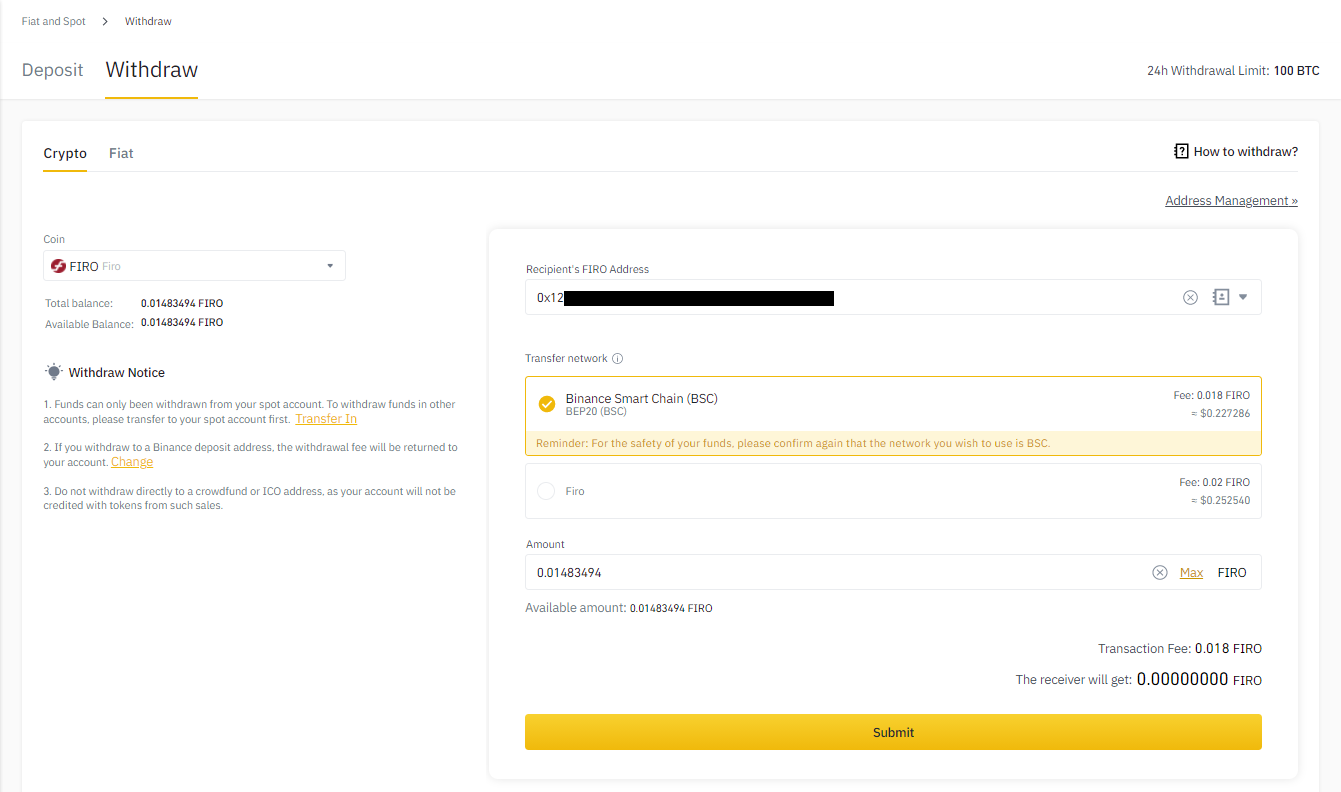
Go to Wallet -> Fiat and Spot. Head to the FIRO section and choose Withdraw.
-
In ‘Recipient’s FIRO Address’, enter the address from your Metamask wallet.
-
For ‘Transfer network’, choose ‘Binance Smart Chain (BSC)’ and enter the amount you want to withdraw. Click on Submit when done.
-
Your withdrawal request will be submitted. Once processed, you will receive the BEP20 FIRO in your Metamask wallet.
Adding liquidity to PancakeSwap
Before starting, you must have some BNB in your wallet to pay the transaction fees and wrapped BNB (WBNB) to add to the liquidity pool.
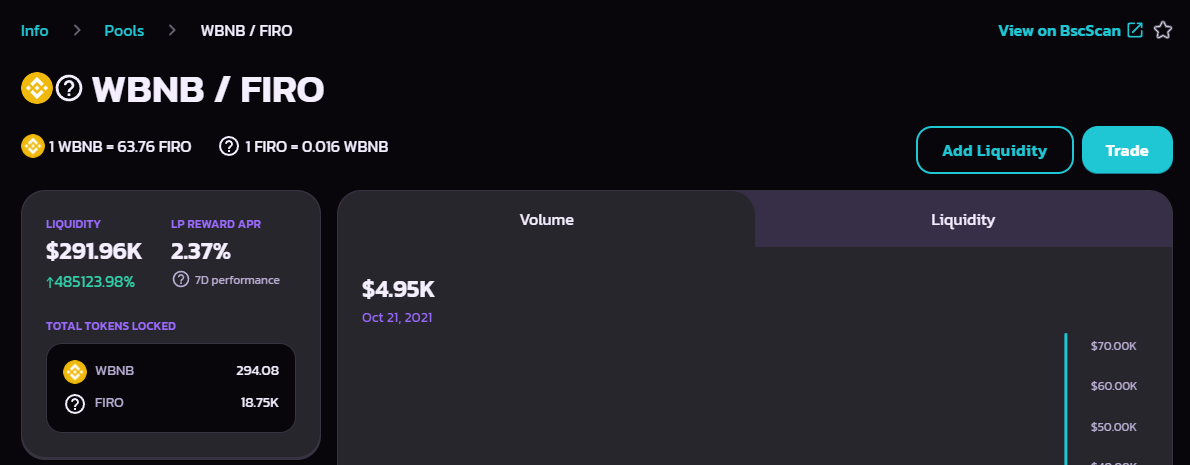
- Navigate to the WBNBFIRO pair page on PancakeSwap.
- Click on the ‘Connect Wallet’ button on the top right of the page and choose the Metamask wallet you have setup earlier. Unlock the wallet if requested.
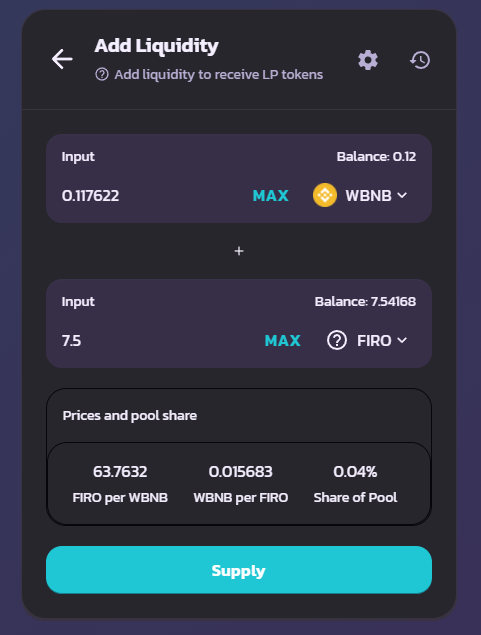
- Click on ‘Add liquidity’.
-
Enter the amount of FIRO and WBNB that you wish to add to the liquidity pool.
-
Click on ‘Supply’ when done. Confirm the transaction on your wallet.
-
Once done, you will return to the same page again. Click on the ‘Supply’ button, and in the pop up verify all details are correct, then click ‘Confirm supply’ and confirm the transaction on your wallet.
-
Once the transaction confirms, your FIRO and WBNB will be added to the liquidity pool.
Checking your liquidity on PancakeSwap
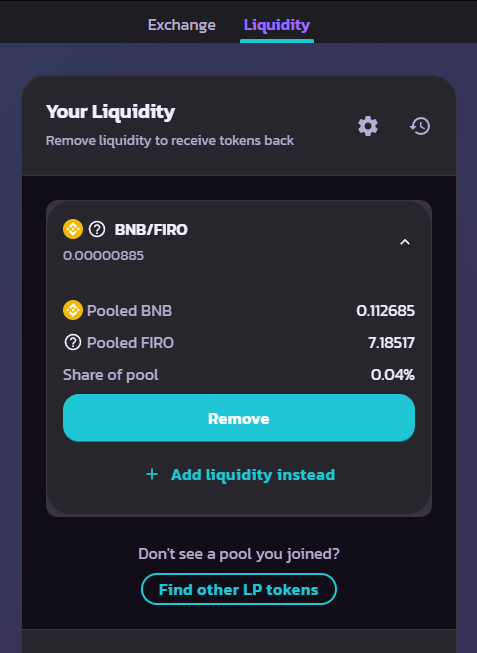
Navigate to the PancakeSwap Liquidity page and ensure that your wallet is connected. Your liquidity information will be displayed.
Removing liquidity from PancakeSwap
-
Navigate to the PancakeSwap Liquidity page.
-
(Skip this step if your wallet is already connected) Click on the ‘Connect Wallet’ button on the top right of the page and choose the Metamask wallet you have setup earlier. Unlock the wallet if requested.
-
Locate the pair that you wish to remove liquidity from. Click on ‘Remove’ button
-
At next page, set the amount of Liquidity to be removed
-
Click on the ‘Enable’ button. Sign the request on your wallet
-
Once done, you will return to the same page again. Click on the ‘Remove’ button, and in the pop up verify all details are correct, then click ‘Confirm’ and confirm the transaction on your wallet.
-
Once the transaction confirms, your FIRO and WBNB will be returned to your wallet along with any fees you have earned from providing liquidity to the pool.